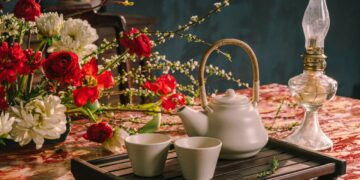
Why limit your spectacular table spreads to the indoors? Outdoor parties are a great way to enjoy the summer sun and relax with friends, so it’s only natural that you’d want to set just as good of a table under the stars. With a few of my favorite tips and tricks, you’ll be setting an outdoor table that will impress your guests so much
Step 1: Use Plates That Are Weather Proof
When selecting an outdoor table setting, the first thing you should consider is the type of plates and bowls you’ll be using. Weather-proof plates are made from porcelain or plastic and can withstand the elements without cracking or breaking. If your outdoor table setting includes heavy dishes like cast iron skillets or glass jars filled with homemade jam, then weather-proof utensils might be a good option as well.
They’re durable enough to last through many seasons of outdoor entertaining—and they’re lightweight enough that transporting them won’t be much trouble! In addition to being available in many different colors and styles (including clear so they blend in with your existing decor), weather-proof accessories are often designed with fun motifs like decorative tuxedo stripes on placemats or themed tablecloths featuring deer prints against an orange background—making them not only functional but also pretty too!
Step 2: Use Rattan Place Mats
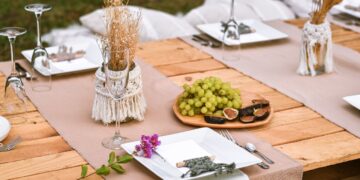
Place mats are the easiest way to protect your table from water and dirt. They can also be used to set the mood, and add color, texture, pattern, or interest. Placemats come in many styles that include:
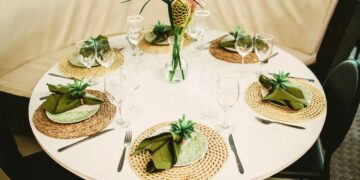
- Woven Rattan Place Mats – This type of rattan placemat is made from weaving thin strips of bamboo together and then treating them with a UV finish so they’re waterproof.
- Outdoor Fabric Place Mats – These colorful fabric placemats look like you went through a lot of work designing them but it was actually super simple! First, you cut out a piece of fabric according to size (30″x20″). Then tie on some jute twine around the perimeter which creates a frame for the fabric. Next, sew together two ends with an overhand stitch until you get back around again where it starts at one end, and connect those two pieces by sewing another seam parallel to the first one just like before until all sides have been sewed closed except for one side closest to where it started so now there’s an opening at top left corner where it started; repeat process all around until entire piece has been sewed closed except for bottom left corner which should remain open so you can turn inside out once finished stitching all other sides closed leaving only one open end for turning inside out later after stitching up all four corners (make sure not sew these corners completely shut). Once turned inside out use scissors to cut off extra material from each side seam edge leaving about ½ inch allowance between the seam allowance and actual fabric width measurement without cutting into any threads underneath; now turn back right side out again making sure not to pull too hard on delicate threadwork while doing so because pulling too hard could cause seams to come apart!
Step 3: Use The Right Flatware To Set An Outdoor Table
Next, you’ll want to make sure you’re using the right flatware for your outdoor table setting. A good rule of thumb is to have a combination of spoons and forks on the table at all times. This will allow the guests at your event to eat what they want without having to worry about whether or not there’s enough silverware for everyone. This can also help cut down on any confusion about what each piece is used for—if someone sees an odd-shaped utensil that looks like it could be both a spoon and fork, then they’ll be able to just reach for either option depending on what food item they’re eating.
It’s also important that you use different types of flatware shapes and sizes so that everyone feels comfortable reaching across the table when it’s time for dinner! If one person has long arms but another person has short ones, this could become problematic if there isn’t enough variation between how far apart each piece is placed from where they sit eating dinner together in their home or apartment building.”
Step 4: Incorporate Everyday Glasses
After you’ve chosen the style of glassware you’re going to use, take a moment to consider if you’ll want to add any accents. The color and shape of your accent glasses can add visual interest and help bring everything together. You can use everyday glasses or specialty pieces for this purpose.
- Everyday Glasses: If you choose to use everyday glasses as an accent piece, look for ones with a stem, base, foot, or rim that’s wider than normal so they stand out from the others on your table.
- Specialty Glasses: If you’d like a little more flair in your table setting then select specialty glasses with rims (like champagne flutes). These are great because they add height and drama while still being functional since they’re not as narrow as other types of glassware.
Step 5: Add Indoor Linens For A Pop Of Color
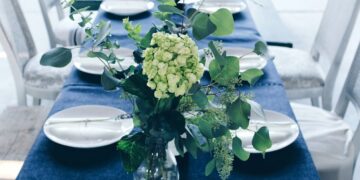
If you’re hosting an outdoor event and looking to add some color and interest, consider adding indoor linens for a pop of color. Simply lay down a tablecloth or placemats for your guests to enjoy. For example, if you are serving breakfast foods such as pancakes, waffles, or French toast, try using a runner on top of the white plates. You can also use runners as table centerpieces for your meal tables!
Step 6: Find Vibrant Serving Platters & Bowls
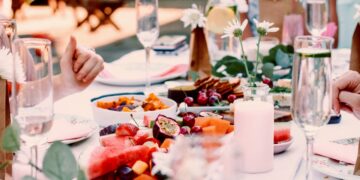
If you have a range of serving platters and bowls, you can use them in your outdoor table setting. Use different sizes and shapes to create visual interest on the table. Try using different materials (wood, ceramic, glass) as well as colors (white, brown). Include patterns on some pieces of your serving ware for an added touch of personality. You might want to keep these items separate from those used for food preparation so that they are not used for cooking purposes (and therefore don’t get dirty).
Step 7: Don’t Forget About Napkin Rings
- Start with a basic napkin ring. These are available in many different styles, sizes, and colors—and you can even make your own or find some at a thrift store.
- Use the same napkin rings as your other utensils. If you’re serving utensils and plates from one collection, make sure that the patterns don’t clash with each other.
- Use multiple rings for larger tables or when entertaining lots of people. For example, if you have a party of 10 or more guests coming over then try using two different styles of napkin rings per place setting so each person has something to tie their napkin around (or clip it shut).
Just because you’re eating outside doesn’t mean that your outdoor table needs to look like an afterthought. Setting a chic and stylish table for your friends and family is simple with these helpful tips.
Just because you’re eating outside doesn’t mean that your outdoor table needs to look like an afterthought. Setting a chic and stylish table for your friends and family is simple with these helpful tips.
We hope this guide has inspired you to explore some new ways of setting your outdoor table, and that it’s been fun learning about all the different details that go into this process! If you’re just starting out on your journey of home decorating, we recommend taking a look at our other guides before going any further…


